

How to check your coolant level: A simple step-by-step guide
Most drivers know they should check their oil.
Far fewer remember to check their coolant.
Coolant plays a critical role in keeping your engine healthy and can help prevent some very expensive repair bills.
In fact, one of the most common causes of engine overheating is simply low coolant levels.
The good news? Checking your coolant is quick, easy and doesn't require any specialist tools.
Here's everything you need to know.
What does coolant actually do?
Your engine generates a huge amount of heat every time you drive.
Without a cooling system, that heat would quickly build up and cause serious damage.
Coolant circulates around the engine, absorbing excess heat and carrying it away to the radiator where it can be dissipated safely.
It also contains additives that help:
- Prevent corrosion
- Protect internal engine components
- Stop water freezing in winter
- Prevent overheating in summer
Put simply, coolant helps keep your engine operating at the temperature it was designed for.
Why is checking coolant important?
If coolant levels drop too low, your engine may struggle to regulate its temperature.
Left unchecked, this can lead to:
- Engine overheating
- Blown head gaskets
- Warped cylinder heads
- Cooling system damage
- Expensive engine repairs
Low coolant levels can also indicate an underlying leak somewhere in the cooling system.
That's why it's worth checking your coolant levels regularly rather than waiting for a warning light to appear.
How often should you check coolant levels?
As a general guide, we recommend checking coolant levels:
- Before summer
- Before winter
- Before long journeys
- If a coolant warning light appears
- If you've noticed the engine running hotter than normal
Some manufacturers recommend more frequent checks, so it's always worth referring to your vehicle handbook.
Safety First: Never check coolant when the engine is hot
Before we go any further, this is the most important point in the entire article.
Never remove the coolant reservoir cap while the engine is hot.
The cooling system operates under pressure and the coolant can reach extremely high temperatures.
Removing the cap too soon can release boiling liquid and steam, potentially causing serious burns.
Always wait until the engine is completely cold before carrying out any checks.
Ideally, leave the vehicle for several hours or overnight.
Step 1: Locate the coolant reservoir
Open the bonnet and look for the coolant expansion tank.
In most vehicles, this is a semi-transparent plastic reservoir located somewhere near the radiator.
The cap will often feature:
- A temperature warning symbol
- A caution label
- A coolant symbol
If you're struggling to find it, your owner's handbook will show the exact location.
Step 2: Check the fluid level
The good news is that you usually don't need to remove the cap.
Look at the side of the reservoir.
You'll see markings labelled:
- MIN and MAX
- LOW and FULL
- Or similar indicators
The coolant level should sit comfortably between these marks.
If it's within the recommended range, you're good to go.
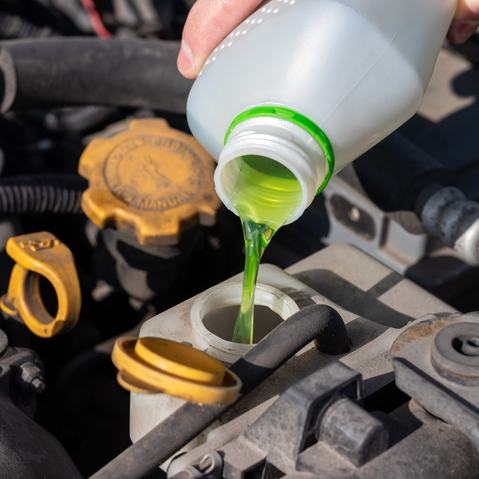
Step 3: Top up if necessary
If the coolant level is at or below the minimum mark, it may need topping up.
When the engine is completely cold:
- Carefully remove the reservoir cap.
- Add the correct coolant for your vehicle.
- Fill gradually.
- Stop just below the MAX line.
- Avoid overfilling, as coolant expands when it heats up.
If you're unsure which coolant your vehicle requires, check your handbook or speak to a trusted garage before adding anything.
Different coolant types should not always be mixed.
Check the condition of the coolant
While you're looking at the reservoir, take a moment to check the appearance of the coolant itself.
Healthy coolant is usually bright and clear.
Common colours include:
- Pink
- Orange
- Green
- Blue
If the coolant looks:
- Rusty
- Brown
- Milky
- Muddy
it may indicate contamination, corrosion or internal engine issues.
In these cases, it's worth having the cooling system inspected professionally.
Look for signs of a leak
Low coolant levels don't happen by magic. If you're regularly topping up the system, there's usually a reason.
Take a quick look around:
- Hoses
- Pipe connections
- Clamps
- The coolant reservoir
Signs to watch for include:
- Damp patches
- White or chalky deposits
- Crusty residue around joints
- Sweet-smelling fluid leaks
Even a small leak can gradually lower coolant levels over time.
Warning signs your coolant may be low
Your car may give you a few clues that coolant levels need attention.
These can include:
- Engine temperature running higher than normal
- Coolant warning light
- Heating not working properly
- Sweet smells from the engine bay
- Steam from under the bonnet
If your temperature gauge suddenly rises while driving, stop somewhere safe as soon as possible and switch the engine off.
Continuing to drive an overheating vehicle can cause significant damage and risk engine fire.
Can you drive with low coolant?
It is not advisable to drive with low coolant levels.
Driving with insufficient coolant increases the risk of overheating and engine damage.
If you've discovered your coolant level is below the minimum mark, it's best to address the issue before undertaking any long journeys.
Need help? We're always happy to take a look
If you're unsure about coolant levels, have noticed a leak or simply want peace of mind before a long journey, we're happy to help.
At Thame Cars, our workshop team regularly carry out cooling system inspections, servicing and repairs for customers across Thame, Haddenham, Chinnor, Long Crendon, Princes Risborough, Wheatley, Bicester and Aylesbury.
Sometimes a quick check is all that's needed.
And when it comes to preventing engine damage, a five-minute inspection today can save a very expensive repair tomorrow.
📍 Thame Cars, Thame, Oxfordshire
🔧 Servicing, MOTs & Repairs
🚗 Quality Used Cars
🏡 Free collection & delivery available locally
📞 01844 215555
🌐 www.thamecars.co.uk
Safe. Simple. Easy.